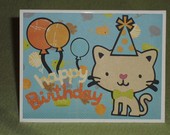
Tuesday, December 6, 2011

Kusudama ball (Origami flower ball)

I made this yesterday.

It's made of 12 flowers, each flower has 5 petals. It took me about 4 hours to make from start to finish.

Each petal is made from a 2" x 2" square. It's about the size of a softball.

I used beads in the middle of each flower just to give it a little something special.


Friday, December 2, 2011

Felt ornaments

It's been a while, but here's some of the latest things I have been working on.

Felt Ornaments.

Made them so my daughter would be safe this Christmas.

I think I could have done better. I was kind of in a rush, and I didn't use buttons or beads, only puffy paint. Just in case my daughter decided to chew on them.


These two are gifts rather than being put on my tree. I really like how they turned out.

Wednesday, September 21, 2011

Cricut Wild Card Doily Card


I made 2 cards with my Wild Card Cartridge yesterday.

The bigger one was cut at 5.5" and the smaller one was cut at 4.5"

I used the black out feature for the inside white part.

The clouds were cut from my Create a Critter cartridge (sun accessory) and the rainbow was cut using my George and Shapes Cartridge. I cut out circles with the silhouette feature on.

The Happy Birthday was cut from the Create a Critter Cartridge (bear phrase) at 1.5"

I added a little ribbon on the top of each card.

Friday, August 26, 2011

Halloween Cards!

I have been making Halloween cards lately. Sending some to my mom as gifts.
**Had to use my cell to take the pictures, sorry they are so crummy**

Pumpkin Card:

These cards were made from the "Wild Card" cricut cartridge. They were cut out at 5.5". I didn't cut out an envelope for them because I have the small cricut, and I wanted bigger cards.

Not sure I like the 2nd one.


Monster Card:

For the monster cards, I used the "Wild Card" cartridge again. These are cut at 5.5" as well. They are really cute.

I added real buttons on them, and the 2nd one has black spiderweb patterned paper as the body (You can't see it because of the blurry)


Pumpkin Kitty Card:

These are my favorites.

I used the dresser card template for this card.

For the pumpkins, I cut out 3 ovals/circles for each one and layered them to make them pumpkin-y. The top layer is stuck on with a pop dot, so it gives it a little dimension. The pumpkin faces were hand drawn with a sharpie marker.

The black cats are glittery (as you can't see... sorry) They were little sticky cut outs I had in my stash of embellishments.

I will probably make a few more of the last card, then it's on to Thanksgiving cards!


Saturday, August 20, 2011

New Cricut Cartridge!


I finally got my new cricut cartridge. It is the "Wild Card" cartridge.

This looks so fun! I haven't made anything with it yet, but I will soon. I have the small cricut, so I hope I am able to cut everything ok. I found a cutting guide online, so I know the max sizes I can cut each card and envelope. (This might be a good excuse to buy the bigger cricut machine!)

I will post some pictures once I make a few things. It would be fun to go through and make one of each. I might do that. I have a few cards to make for my mom, so I will probably do those first.

Tuesday, August 9, 2011

Congrats Funky Fold Card


Made this card for a friend who wanted it for a wedding. She sent me the invitation and asked me to match the colors.

Used the Funky fold technique for the card base Found Here (I also have a template on my blog a few posts down)

The flowers are from the George and Shapes cricut cartridge. The largest flower is 2 1/2". I used the blackout feature to create the red edge around them, and then used two kinds of patterned scrapbook paper for the insides.

The "congrats" is from the Doodlecharms cricut cartridge. Used the same technique of the flowers, having the red edge around it.

Thanks for looking, and feel free to leave comments or questions!

Monday, August 8, 2011

Wedding Card


Here's a card I made for a wedding. A friend of mine needed a card to give to a couple who was getting married, so I whipped this up for her.
I used my "Stretch Your Imagination" cricut cartridge for the glasses, and the George and Shapes cartridge for the hearts.
I used the "Dresser Stair Step Card template" for the card base. Found here: Dresser stair step card template

Wish Funky Fold Birthday Card

This is a birthday card that I made for my grandpa's birthday.
I used the funky fold technique. The green stars are sparkly.

Friday, August 5, 2011

New Cards!

I made some cards. A few of them I made a while ago, I just hadn't taken pictures of them.

I do want to apologize for the quality of the pictures. They were taken on my cell phone. My camera is dead and my comp is broken, so this was really my only option.

First off:
The Funky Fold Card Design! I was very happy to try this one out.
You can't see it, but the "Ahoy" and some of the seaweed is sparkly. I came up with a cool way to add a little sparkle. I have some glitter glue pens (crayola) and I put some of that on it then used my finger to spread/tap it around.

I really like the 3D effect of this card.


I am currently working on a birthday card for my gramps (he'll be 93 this month) Pics will be posted (hopefully with better quality) when it's done.


Here is a card that I made for my boyfriends sisters in-laws. They let us use their timeshare points in FL.
The one I sent them had "thanks" on the front.

This card is what I made for my sisters friend. She's having a baby and they are decorating the babies room in an owl theme. I tried to match the colors. My sister said it was perfect.


The last card is one that I just felt like making. I have about 4 of these. I'm going to keep them in my "stash" until an occasion comes up I can use it for.


Wednesday, August 3, 2011

Funky Fold Card Template

I was looking up ideas on different card styles and came across Cheryls Funky Fold card. She has a nice video on how to do it on her blog found here:  Funky Fold Card Video

Here's the card that she made:


I thought it would be helpful to me if I had a template, so I looked high and low on the internet, but couldn't find one. So, I decided to make one.

Here is the Funky Fold Card Template that I came up with:

I hope this template along with her video helps anyone that has run into trouble making the card.

It looks like a fantastic card to make. Once I make one (or a few) I will put up pictures.

Enjoy!

EDIT:
After going home and trying my template, I came up with an easy way to use it with really no measuring.

I basically just laid out the template over the top of my paper, and lined up the score marks on my cutter/score board. After I scored all the lines, I lined up the cut marks on the cutter and cut them. Kind of hard to explain, but it was easier for me than doing all that measuring.

I started to make an octopus card, but ran out of time before I had to go to bed, so it's a work in progress. Pics when it's finished.

Tuesday, August 2, 2011

Crafters Block

It has come to my attention that I am suffering from crafters block.

I tried to make some cards last night, but I could not come up with anything. I do have a folder with ideas in it, but that wasn't much help. (Not to mention my cricut was being difficult)

Guess I'll surf the internet and see if I can find anything that gives me some ideas... Maybe I need more paper or cartridges... that might solve my problems... lol

Monday, August 1, 2011

SORRY!

I realize I haven't posted in a while. I have made several cards and a couple baby blankets since my last post.

I have been horrible at documenting my finished projects...

Once I get pictures of the newest things I have made, I will put them up.

In the mean time, here are a few things I made earlier this year.


All these cards were made with the "create a critter" cricut cartridge.


These two cards were hand embroidered on a tri-fold card (no stitching showing on the inside)


Monday, June 13, 2011

Baby Blanket on the Knifty Knitter 22" Loom

I completed the baby blanket I was going to make.
I made it on the Knifty Knitter's 22" long loom
It took me about 4 hours total and 2 skeins of 108 yard pink bulky baby yarn.
It measures 20" by 26" and is the perfect size for my little girl.


Thursday, June 2, 2011

Knifty Knitter scarf

I recently bought a knifty knitter, and decided to try it out. So far I have only made a couple scarves.
Here is the 1st one I made.
I think it turned out pretty well considering I have never knitted or crocheted in my life. It was really easy to do once I figured it out.

I have a 22" loom coming in the mail. Once it does I plan on making a baby blanket for my little girl. I will update with pictures once it's finished.

Thursday, March 17, 2011

Little Blanket with Ribbons

Here is a little blanket I made for my daughter. It's made from 2 fleece blankets (bought at CVS for $1 each)

Front:
Back:

Got the idea/tutorial here: Baby "tag" Blanket Tutorial

I started out by using an 8 1/2 x 11 sheet of paper as my template. (ended up being about 7x10 when sewn)

After cutting out my pieces, I pinned ribbon pieces on the striped piece, then put the green piece on top and pinned them together. (Yes I did it wrong the 1st time and the ribbons ended up on the inside when I turned it right side out) Kind of like a ribbon sandwich...

After it was all pinned, I sewed it together leaving a small opening on one of the sides so I could turn it right side out.

After turning it right side out, I folded the opening, and ironed it down so it would stay that way.

I sewed around the edges twice, making sure to sew the opening closed. 

Then, I used Seam-Steam 2 and another piece of fabric, and cut out a heart shape. I took off the backing, and ironed on the heart to the little blanket. (Turned the iron too hot at first, and almost burnt the fleece)

Not a hard sewing project, pretty dang easy in fact.

I would note, that if you do make this, I would not advise selling it. There is a "Taggie Blanket" that has this design patented and apparently they pursue anyone who tries to sell their idea. I did however see some of these tag blankets at my local resale baby stuff store.


Apple Baby Crinkle Toy

I decided to make a crinkle toy for my little girl. She likes Apples, so I thought it would be appropriate.
I have to admit, it is not the best, but it was my first time trying it out, and I was happy with the results. I got the basic idea here: Crinkle Toy Tutorial

I cut out the apple shape on paper with my cricut (Create A Critter cartridge) then put that template onto my fabric.

I pinned some ribbon on the inside of the apple to mimic a stem and leaves. (I did it totally wrong the 1st time, and ended up having the ribbons on the inside of the apple)

Then I pinned the whole thing together and sewed it, leaving an opening on the side to fill it.

After it was sewn, I turned it right side out, and added some fluff and a piece of a baby wipes bag (for the crinkle) inside.

Then I folded the open end closed and ironed it (so it would stay folded) and then sewed along the outside edge (poorly I might add)

After it was all sewn, I added the eyes and smile with black embroidery thread.

It was a pretty easy project to do, I am pretty new at sewing, but hope to get better.


Thursday, March 10, 2011

Drawstring Bag

This is the drawstring bag that I made last night. It's about a foot tall.
I think I did a pretty good job. The inside liner is green. I used my sewing machine and just straight stitched the whole thing. I got the idea/tutorial here: Drawstring Bag Tutorial
I didn't do it exactly like the tutorial, but it did give me some good ideas. I am hoping to try and make a bigger one.