Wednesday, June 12, 2013

Dr Who Felt Dolls (Part 2)

I finished all of the dolls. I got about 2 done a day. It was really fun.

Let's start off with the Doctor's lady companions:

Rose Tyler, Martha Jones, and Donna Noble. (When I first watched Dr. Who, I wasn't too fond of Donna, but after going through a couple more times, she is my favorite companion so far)


Here are season 5 and 6's companions:

Rory, Amy Pond, and River Song (I was really pleased with the way River turned out. I thought about making Rory in Roman attire, but I decided not to)


Where are the aliens you ask??

Right here:
Ood, Adipose (I love them they are sooo cute) and Cyberman


Weeping Angel, Silence, and a Dalek


Finally I made the TARDIS out of paper. I thought it would be a good way to box them all up.

Closed:


Open:


Wednesday, June 5, 2013

Dr Who Felt Dolls

I realize it's been almost a year since I posted last. I have been doing some crafting, but I just haven't documented anything. I wanted to pin this, so I had to put it somewhere. So, here it is!

Dr Who Felt Dolls!

#9, #10 and # 11!


All I did was printed off a paper doll template that I found online and then cut out the clothes and hair to match what the Dr.'s wore. It was really just a trial and error. I think they turned out lovely.

Eddie (my husband, who is not a Dr. Who fan) said the middle one was kinda cool. I said "Yeah, he's my favorite Dr"

I plan on making Rose, Martha, Donna, Amy, Rory, and River. No Dr. Who set would be complete without aliens! So, I'll attempt to make a Dalek, Ood, Silence, Weeping Angel, and a Cyberman. I think I will box them up in a cardboard box shaped as the TARDIS.

That sounds like an amazing plan.

UPDATE:
I made Rose last night. She came out great! I realized that I couldn' really make any more companions because I didn't have several colors I needed for clothing and hair. Pictures up after I finish a few more.

Friday, July 27, 2012

Crochet Doll


I made this crochet doll for my daughter. I used a few patterns for it. The head was a basic ball pattern, the body was the basic ball pattern, but with more sc rows in the middle. The legs and arms I came up with my own pattern, the ruffles on the skirt are actually from a flower pattern, and for the hair, I found a nice tutorial online on how to attach it and make it wavy.

The flowers on the dress and shoes are some old left over ribbon? (is that the right term?) that I had lying around. I hot glued it around and added buttons. 

The feet and hands have glass beads in them to give them some weight. She stands about a foot tall.

Sorry I don't have any pattern available. If someone wants one I can probably make one, but I am pretty new at crochet (and actually only know how to crochet in the round) and it might not be great.

Friday, June 22, 2012

Another Can Kozie

I made a coworker a special can kozie for one of her friends who is a Dr. Who fan. Apparently, this girl is kind of obsessed with Dr. Who, but that's ok!

(I also like Dr. Who, and was thinking about making one of these for a while)

Here it is. The TARDIS Kozie:


I do realize that there are some inaccuracies, but hey, I'm still a beginner in crochet, and I really didn't have a lot of materials to get really detailed. I think it turned out pretty good for my set of skills.

It's made from working in the round. Once the crocheted round fits the bottom of the can, you sc in back loops around, then I used a hdc all the way to the top. The last round is just a sc around.

For the sides (there are 4, so it has a "square" shape) I took my yarn through the bottom of the kozie, and then inserted my hook into the hdc. I single crotcheted into one stitch, then chained one, and repeated the process all the way to the top (I know that's a little confusing)...

After all 4 sides were done, I cut out felt and used a sharpie for the windows and police box sign. For the "Police Box" on top, I used silver paint marker on felt. It was not easy. I had to "dot" each letter in since the pen wouldn't write it. It kept dragging the felt. Then I hot glued everything on.

I'm really certain that almost anything can become a can kozie... I would love some more ideas!

Wooden Letters Decoupage


I read online to use mod podge for this decoupage project, but I didn't have any on hand.

I tried to make my own using an online recipe of 50% Elmer's glue and 50% water. That did not work. The paper never stuck to the wooden letters.

Back to square one! I ended up using Aleene's Tacky Glue (undiluted). Here's the steps I took:

The first thing I did was paint around the edges of the letters with white paint.
  • I used finger paint, it's all I had on hand. It was very light, and did not cover well in places. If I do this again, I will use regular acrylic white paint.
After that was dry, I spread glue onto the letters with a paintbrush and put my paper on top, smoothed it out so there were no air bubbles, and then set them aside.
  • I did NOT pre-cut the letters out of the scrapbook paper. I covered the entire letter with a rectangle of paper. Cutting will come later.
When all the letters were dry (didn't take long, in fact, by the time I was done with the last letter, the first ones were already dry. That glue is amazing) I carefully cut around the edges of each letter with a box cutter.
  • I SHOULD have used a craft knife, but I couldn't find mine, and I thought "it's pretty much the same thing"... No, not really. While it did cut around the edges, there were some rough parts where the paper did not cut, it ripped the edges a little. Some parts looked really tattered.
After all the letters were cut out, I decided to stack them. Once again, I used Aleene's Tacky glue to glue them on top of each other. I was a little worried at first, because I wasn't sure if the glue would hold them together, but it did. I thought about adding some screws in the back to make it more sturdy, but it really doesn't need them.

When it was all put together, I was unhappy with some of the letters rough edges (aka, my terrible cutting). I decided to use glitter glue to outline them. Then I accented some of the letters with the glitter glue to make it look better.

That's all it took. Even though I ran into a few hiccups, I think they turned out great. I know my daughter (Vallerie) likes her name on the door. She loves to be picked up so she can point at each letter.


I know that other people probably have better ways of doing this project, but I'm happy with mine. It was quick and fun. An easy project for anyone to do.

Thursday, May 31, 2012

Can Kozies

Lately my craft has been crocheting can kozies. I got the idea from a shark from a co-worker of mine. Since then I have come up with my own ideas. Here are a few pics of what I have made:

Zombie aka "Brrrraaaaaiiiiins"

 Corn (because I work in the ag business and corn is cool!)

Fish and Shark

I started out with the pattern for the shark, it was actually one I found online for a pencil can cover, but I altered it a bit to fit a soda can.

I have some other ideas for more kozies. If I get them made I will put up some pictures.


Friday, February 17, 2012

Monday, February 13, 2012

Valentines!

Made 6 Valentines last night (a little late yes I know)
I used my "sugar and spice" cricut cartridge and my "B is for boy" cricut cartridge.


Tuesday, December 6, 2011

Kusudama ball (Origami flower ball)

I made this yesterday.

It's made of 12 flowers, each flower has 5 petals. It took me about 4 hours to make from start to finish.

Each petal is made from a 2" x 2" square. It's about the size of a softball.

I used beads in the middle of each flower just to give it a little something special.


Friday, December 2, 2011

Felt ornaments

It's been a while, but here's some of the latest things I have been working on.

Felt Ornaments.

Made them so my daughter would be safe this Christmas.

I think I could have done better. I was kind of in a rush, and I didn't use buttons or beads, only puffy paint. Just in case my daughter decided to chew on them.


These two are gifts rather than being put on my tree. I really like how they turned out.

Wednesday, September 21, 2011

Cricut Wild Card Doily Card


I made 2 cards with my Wild Card Cartridge yesterday.

The bigger one was cut at 5.5" and the smaller one was cut at 4.5"

I used the black out feature for the inside white part.

The clouds were cut from my Create a Critter cartridge (sun accessory) and the rainbow was cut using my George and Shapes Cartridge. I cut out circles with the silhouette feature on.

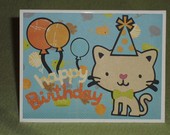
The Happy Birthday was cut from the Create a Critter Cartridge (bear phrase) at 1.5"

I added a little ribbon on the top of each card.

Friday, August 26, 2011

Halloween Cards!

I have been making Halloween cards lately. Sending some to my mom as gifts.
**Had to use my cell to take the pictures, sorry they are so crummy**

Pumpkin Card:

These cards were made from the "Wild Card" cricut cartridge. They were cut out at 5.5". I didn't cut out an envelope for them because I have the small cricut, and I wanted bigger cards.

Not sure I like the 2nd one.


Monster Card:

For the monster cards, I used the "Wild Card" cartridge again. These are cut at 5.5" as well. They are really cute.

I added real buttons on them, and the 2nd one has black spiderweb patterned paper as the body (You can't see it because of the blurry)


Pumpkin Kitty Card:

These are my favorites.

I used the dresser card template for this card.

For the pumpkins, I cut out 3 ovals/circles for each one and layered them to make them pumpkin-y. The top layer is stuck on with a pop dot, so it gives it a little dimension. The pumpkin faces were hand drawn with a sharpie marker.

The black cats are glittery (as you can't see... sorry) They were little sticky cut outs I had in my stash of embellishments.

I will probably make a few more of the last card, then it's on to Thanksgiving cards!


Saturday, August 20, 2011

New Cricut Cartridge!


I finally got my new cricut cartridge. It is the "Wild Card" cartridge.

This looks so fun! I haven't made anything with it yet, but I will soon. I have the small cricut, so I hope I am able to cut everything ok. I found a cutting guide online, so I know the max sizes I can cut each card and envelope. (This might be a good excuse to buy the bigger cricut machine!)

I will post some pictures once I make a few things. It would be fun to go through and make one of each. I might do that. I have a few cards to make for my mom, so I will probably do those first.

Tuesday, August 9, 2011

Congrats Funky Fold Card


Made this card for a friend who wanted it for a wedding. She sent me the invitation and asked me to match the colors.

Used the Funky fold technique for the card base Found Here (I also have a template on my blog a few posts down)

The flowers are from the George and Shapes cricut cartridge. The largest flower is 2 1/2". I used the blackout feature to create the red edge around them, and then used two kinds of patterned scrapbook paper for the insides.

The "congrats" is from the Doodlecharms cricut cartridge. Used the same technique of the flowers, having the red edge around it.

Thanks for looking, and feel free to leave comments or questions!

Monday, August 8, 2011

Wedding Card


Here's a card I made for a wedding. A friend of mine needed a card to give to a couple who was getting married, so I whipped this up for her.
I used my "Stretch Your Imagination" cricut cartridge for the glasses, and the George and Shapes cartridge for the hearts.
I used the "Dresser Stair Step Card template" for the card base. Found here: Dresser stair step card template

Wish Funky Fold Birthday Card

This is a birthday card that I made for my grandpa's birthday.
I used the funky fold technique. The green stars are sparkly.

Friday, August 5, 2011

New Cards!

I made some cards. A few of them I made a while ago, I just hadn't taken pictures of them.

I do want to apologize for the quality of the pictures. They were taken on my cell phone. My camera is dead and my comp is broken, so this was really my only option.

First off:
The Funky Fold Card Design! I was very happy to try this one out.
You can't see it, but the "Ahoy" and some of the seaweed is sparkly. I came up with a cool way to add a little sparkle. I have some glitter glue pens (crayola) and I put some of that on it then used my finger to spread/tap it around.

I really like the 3D effect of this card.


I am currently working on a birthday card for my gramps (he'll be 93 this month) Pics will be posted (hopefully with better quality) when it's done.


Here is a card that I made for my boyfriends sisters in-laws. They let us use their timeshare points in FL.
The one I sent them had "thanks" on the front.

This card is what I made for my sisters friend. She's having a baby and they are decorating the babies room in an owl theme. I tried to match the colors. My sister said it was perfect.


The last card is one that I just felt like making. I have about 4 of these. I'm going to keep them in my "stash" until an occasion comes up I can use it for.


Wednesday, August 3, 2011

Funky Fold Card Template

I was looking up ideas on different card styles and came across Cheryls Funky Fold card. She has a nice video on how to do it on her blog found here:  Funky Fold Card Video

Here's the card that she made:


I thought it would be helpful to me if I had a template, so I looked high and low on the internet, but couldn't find one. So, I decided to make one.

Here is the Funky Fold Card Template that I came up with:

I hope this template along with her video helps anyone that has run into trouble making the card.

It looks like a fantastic card to make. Once I make one (or a few) I will put up pictures.

Enjoy!

EDIT:
After going home and trying my template, I came up with an easy way to use it with really no measuring.

I basically just laid out the template over the top of my paper, and lined up the score marks on my cutter/score board. After I scored all the lines, I lined up the cut marks on the cutter and cut them. Kind of hard to explain, but it was easier for me than doing all that measuring.

I started to make an octopus card, but ran out of time before I had to go to bed, so it's a work in progress. Pics when it's finished.

Tuesday, August 2, 2011

Crafters Block

It has come to my attention that I am suffering from crafters block.

I tried to make some cards last night, but I could not come up with anything. I do have a folder with ideas in it, but that wasn't much help. (Not to mention my cricut was being difficult)

Guess I'll surf the internet and see if I can find anything that gives me some ideas... Maybe I need more paper or cartridges... that might solve my problems... lol

Monday, August 1, 2011

SORRY!

I realize I haven't posted in a while. I have made several cards and a couple baby blankets since my last post.

I have been horrible at documenting my finished projects...

Once I get pictures of the newest things I have made, I will put them up.

In the mean time, here are a few things I made earlier this year.


All these cards were made with the "create a critter" cricut cartridge.


These two cards were hand embroidered on a tri-fold card (no stitching showing on the inside)